The pre-requisite of this article is that you should've verified your support email against a mailbox using email forwarding and it shows verified to you, something like this.
Now, incoming emails to the support email specified will create tickets/comments. However, if you reply as an admin/agent to those tickets/comments, the emails will still go out from the desk support email address, i.e. the one ending with neetodeskemail.com. The custom email, therefore, shows up as Unauthenticated.
To be able to send emails from your specified custom email, you need to authenticate NeetoDesk to send emails on behalf of you. Here are the steps to do so.
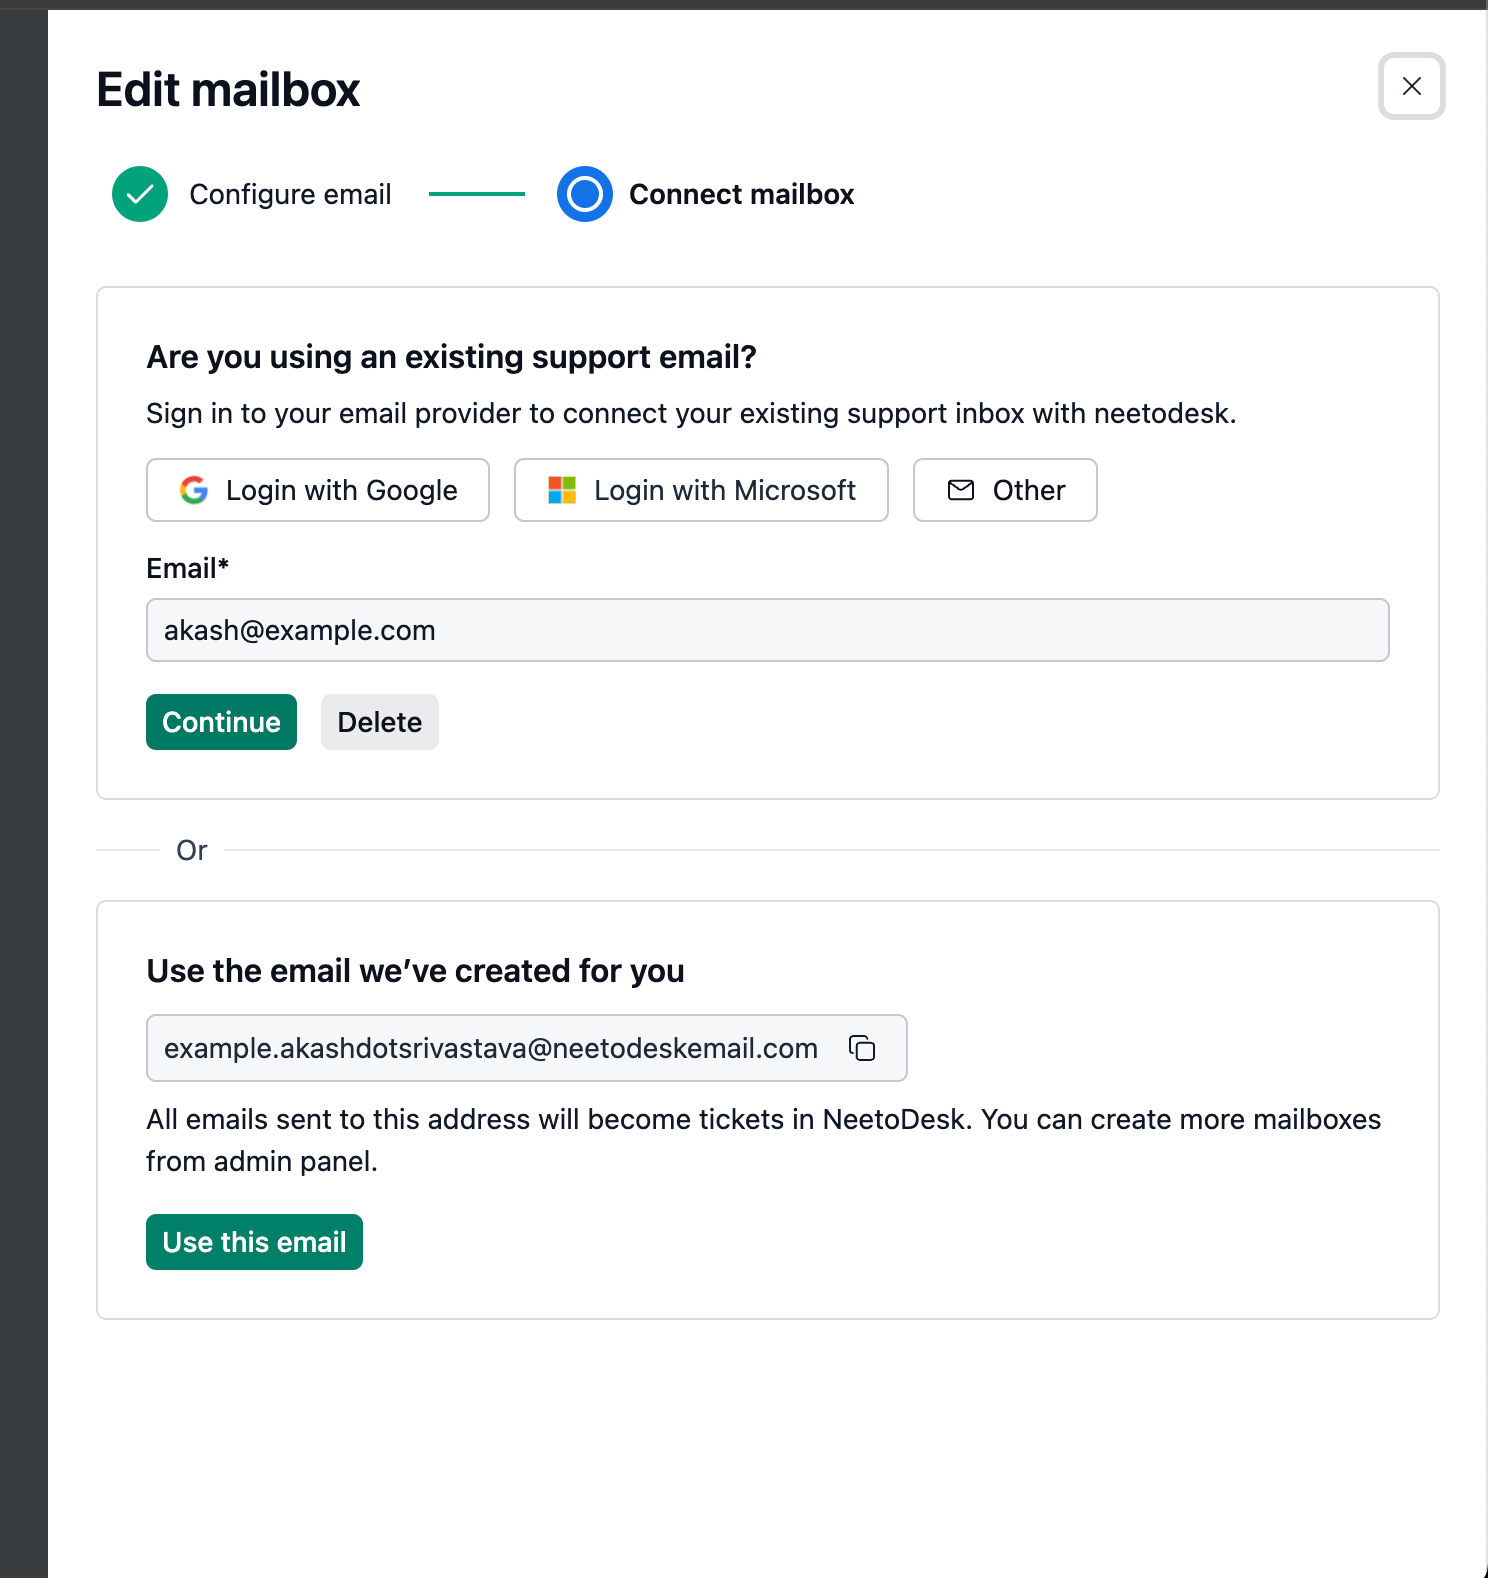
Click the three-dots button against your support email and click
Manageto open the manage screen.-
In this pane, click
Continuejust below your support email. -
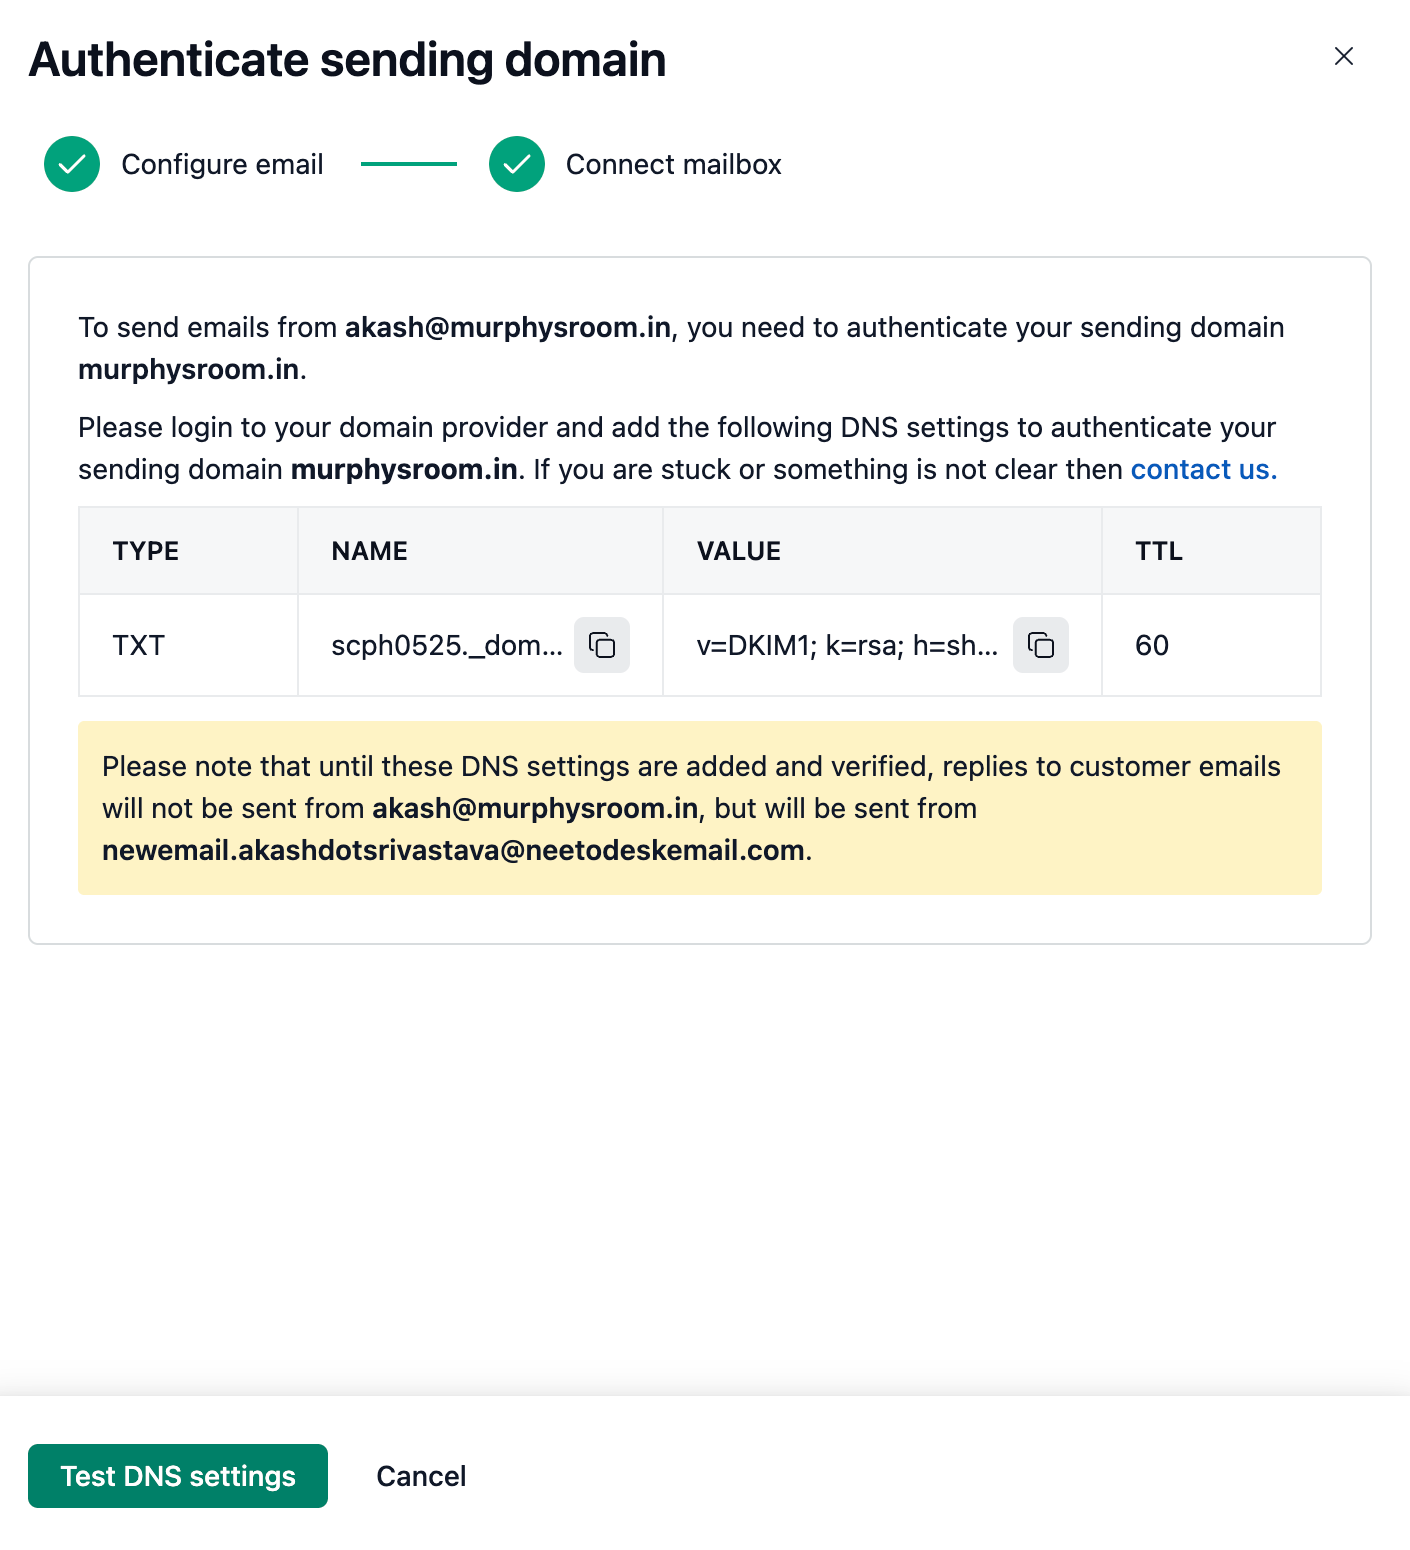
You'll be taken to a screen like this that shows you a DNS record to add to your domain's DNS settings, wherever it is hosted. Please copy the exact type, name, value and ttl from the provided table into your dns settings and save them.
-
Once you've verified that you've added the DNS settings correctly, click
Test DNS settingsto verify this. If the verification passes, you'll get a success message and your support email will show up asVerifiedas well asAuthenticated. If you instead get a message that DNS settings were not verified, ensure you've added the DNS settings in your provider correctly and try again. Once the support email is authenticated, replies to tickets will go from the support email specified.


